SSH, or Secure Shell, is used to log into a remote machine and execute commands and many other things like viewing CPU usage and performance. It creates a secure connection between two computers through a encrypted tunnel.
To make a SSH connection we need an SSH Client in our computer. PUTTY and WinSCP are two popular SSH solutions for windows environment. As Both Linux and macOs have their own built-in terminals so we won’t necessarily need to download an SSH Client. In this step-by-step instructions for SSH access, outlined below, will help you get access to your server remotely.
We will be using ubuntu terminal to get the ssh access.
Let’s get started.
Step 1 : Find the SSH Access path
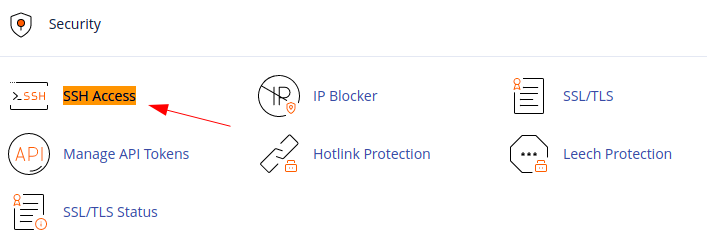
- Login to your cpanel and find SSH Access as pointed out on the below picture

- Click the SSH Access
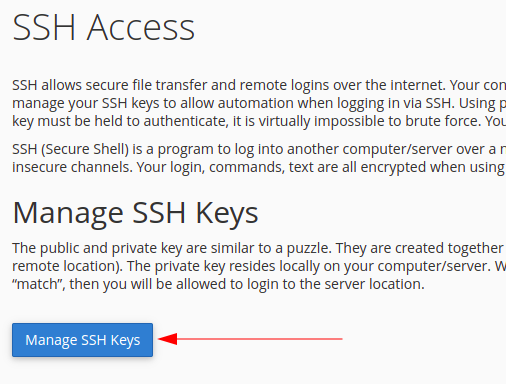
Step 2 : Manage SSH Keys
- You need to click the Manage SSH Keys button

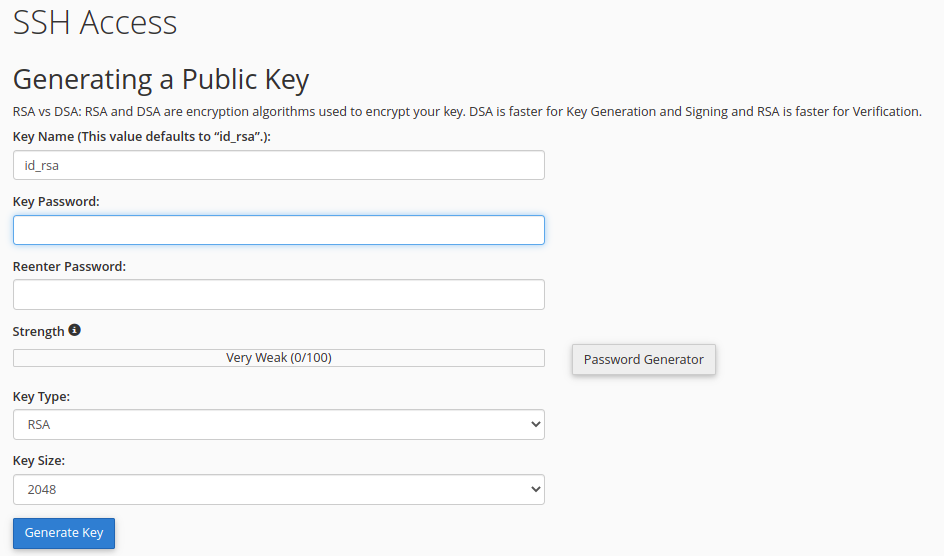
- Next, let’s generate a new key.

- Fill up the form for creating the key.

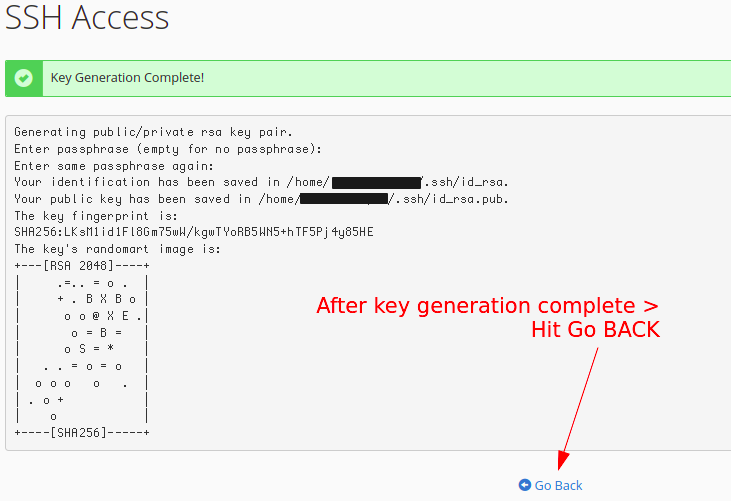
After this, your key will be generated successfully and will be saved in your cpanel account in .ssh folder.

Step 3 : Authorize the recently created key

-
Recently created key will be on unauthorized state by default.
-
So in order to authorize the key, we need to manually click manage button and authorize it.

Step 4 : Get private key to your computer

- Copy the downloaded private key to your .ssh folder.
Step 5 : Final step
- now you have SSH to your host. Enter below command in your terminal after modifying according to your setup.
|
|
- *username* should be your cpanel username.

- *cpanelip* should be your cpanel IP.
-
You should hit yes for your RSA key fingerprint to be added to known_hosts.
-
Lastly, enter your cpanel password and you are in.
This 5 steps will log you in to your account via SSH.